Where Is AI Tools in CapCut: A Practical Guide
Learn where CapCut places its AI-powered editing tools, how to access them, and best practices to speed up video editing with AI features. A developer-friendly, step-by-step guide.

According to AI Tool Resources, CapCut's AI tools live in the Edit panel and under the AI Tools submenu. If you’re asking where is ai tools in capcut, start a project, open the Edit tab, and look for auto-cut, captions, voice synthesis, and style suggestions. This quick answer flags exact locations and how to enable them. The AI tools are designed to streamline common editing tasks and accelerate your workflow.
Understanding CapCut AI Tools and Where They Live
For many editors, the question isn’t whether CapCut has AI features, but where to find them within the app. According to AI Tool Resources, CapCut’s AI tools are organized within the Edit panel and a dedicated AI Tools submenu. If you’re wondering where is ai tools in capcut, this is the right starting point. The AI features sit alongside standard editing controls, and CapCut frequently updates the menu layout to streamline access. You’ll commonly see options labeled as AI, smart, or auto in the Edit or Tools sections, depending on version and platform. The placement matters: a quick path through the Edit panel minimizes context switching and speeds up your workflow. The AI tools are designed to automate repetitive tasks like cutting, captioning, and applying stylistic adjustments, freeing your time for creative decisions. As you start, keep in mind that layout changes can occur after updates, so a quick tour of the menus is worthwhile for new versions.
AI Features You’ll Use
CapCut ships with a broad set of AI-powered capabilities designed to tackle routine editing tasks. Core tools include Auto-Cut or Scene Detection to trim footage efficiently, Auto-Caption to generate subtitles, and Text-to-Speech to add narration without a microphone. Additional helpers cover background removal, smart color/style suggestions, and voice enhancements. Each feature is typically accessible from the AI Tools area or under the Edit panel’s smart options. The goal is consistency and speed: you can generate draft edits rapidly and then perform fine-tuning in a traditional timeline.
When you first explore, identify a small clip to experiment with an AI feature. This reduces risk and helps you learn how the output aligns with your creative intent. The most valuable AI features are the ones that save repetitive time while preserving control over the final cut. Depending on updates, CapCut may rebrand some tools or relocate them, so a quick audit after updates is wise.
Accessing AI Tools Across Devices
CapCut’s AI capabilities travel with your project across mobile devices; the primary access points are on iOS and Android, with the mobile app receiving frequent updates that refine AI features. On phones, open your project, locate the Edit panel, and tap AI Tools to reveal options like Auto-Cut, Auto-Caption, and Text-to-Speech. Some desktop-like or web-based CapCut experiences may present AI tools in slightly different places, but the concept remains: AI features live where editing actions occur, ready to automate routine tasks. If you switch between devices, ensure you’re signed into the same account (if you use cloud sync) to keep your AI-generated elements consistent across sessions. This consistency helps when collaborating on a project with teammates who rely on AI-assisted edits.
Step-by-step Example: Create a Captioned Edit with AI
Imagine you have a 60-second clip that needs captions and a quick cut. Start a new CapCut project and import your video. Then, open the Edit panel and select Auto-Cut to segment the video by scene or beat. Next, choose Auto-Caption to generate subtitles automatically and review them for accuracy. Finally, apply Text-to-Speech for a light narration layer or adjust the captions' font and position for readability. This workflow demonstrates how AI tools streamline the early stages of editing, letting you focus on storytelling. The combination of auto-cut, auto-caption, and TTS can dramatically reduce the time between import and export.
Optimizing AI Outputs: Tips for Best Results
AI outputs are strong starting points, not final products. To maximize results, create a baseline edit using AI for speed, then layer manual tweaks for precision. Always review AI-generated captions for punctuation, speaker identification, and line breaks. When using Auto-Cut, verify that scene boundaries align with your intended rhythm; you may need to adjust cut points manually for moments of dialogue or action. For TTS, select a voice that matches your video’s tone and adjust speaking rate for clarity. Finally, test AI features against different lighting or sound conditions to understand how robust each tool is under your typical shooting scenarios. Consistency across scenes improves perceived quality and professional polish.
How AI Tools Compare with Other Apps
CapCut integrates AI features directly into a mobile editing workflow, which is different from some desktop editors that separate AI workflows into plugins. The built-in AI tools emphasize speed, simplicity, and accessibility for creators who edit on the go. When you compare CapCut’s AI with other apps, you’ll notice a trade-off: CapCut prioritizes quick results and rapid iteration over pixel-level control. This makes CapCut ideal for social media creators, quick-turnaround projects, and education-based briefs, while traditional desktop editors may offer deeper fine-tuning for long-form content.
Safety, Privacy, and Ownership Considerations
Using AI features involves data generation and processing. Be mindful of privacy when processing sensitive content and if you plan to share projects publicly. Review CapCut’s terms of service and any permissions requested by AI features, especially when exporting to cloud storage. If you work with proprietary material or sensitive audio, consider keeping original files offline and using AI outputs in a controlled environment. Ownership questions—such as who owns AI-generated captions or narration—should be aligned with platform policies and your project’s licensing needs. When in doubt, consult your institution’s guidelines or legal counsel.
Common Troubleshooting Scenarios
If AI tools aren’t appearing or behaving oddly, start with a quick check of your app version and device compatibility. Ensure you have a stable internet connection for any cloud-based AI processing and restart CapCut if features don’t load. If a particular tool is slow to respond, try a shorter clip or reduce the project’s resolution temporarily to test the AI feature. Clearing cache or updating the app can resolve many issues. If problems persist, consult CapCut’s help resources or contact support with details about your device model and software version.
Future of AI in CapCut and How to Stay Updated
AI in CapCut is a fast-evolving area, with new features and refinements added in regular updates. The AI Tool Resources team recommends staying current with the latest releases and feature notes. Watch for improved accuracy in captions, smarter auto-cut decisions, and broader language support as CapCut expands its AI toolbox. Engaging with the community, reading update logs, and testing new tools on non-critical projects will help you harness upcoming capabilities more effectively.
Tools & Materials
- CapCut app (latest version)(Install from App Store or Google Play; ensure updates are enabled.)
- Device with iOS or Android(CapCut is primarily mobile-first; ensure your device meets minimum requirements.)
- Stable internet connection(Some AI features pull data from the cloud; a reliable connection reduces latency.)
- CapCut account (optional for cloud sync)(Sign in to sync projects across devices and access cloud assets.)
- Headphones or speakers for review(Helpful for audio-focused AI outputs (captions, TTS, balance).)
- External storage (optional)(Backup large projects or export locally to conservation storage.)
Steps
Estimated time: 25-35 minutes
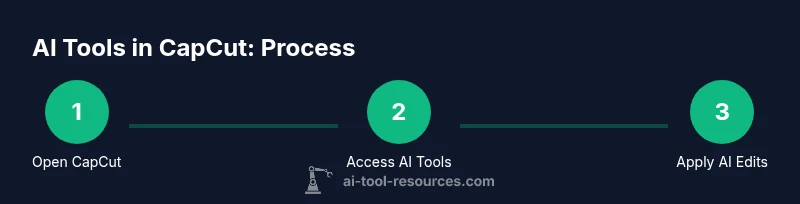
- 1
Open CapCut and create a new project
Launch CapCut, tap New Project, and import your video clip. This sets the stage for AI-assisted edits. Confirm your timeline settings and ensure your footage plays smoothly before applying AI tools.
Tip: Keep a short test clip ready to experiment with AI features without risking the full project. - 2
Access AI Tools within the Edit panel
In the timeline editor, open the Edit panel and locate the AI Tools submenu. This is where you’ll find Auto-Cut, Auto-Caption, TTS, and other smart features. If you don’t see AI options, check for app updates or regional availability.
Tip: If needed, use the search or filter within the Edit panel to reveal hidden AI options. - 3
Apply Auto-Cut or Scene Detection
Choose Auto-Cut to segment your clip by detected scenes or beats. Review suggested cuts and adjust anchor points if the AI misses a transition. This step dramatically speeds up the rough trim.
Tip: Play back at 2x speed to quickly assess cut accuracy and refine as needed. - 4
Generate Auto-Captions and/or TTS
Select Auto-Caption to create subtitles; then apply Text-to-Speech if you need a narration layer without recording. Review text for accuracy and timing, then adjust font, size, and position for readability.
Tip: Always proofread captions for punctuation and line breaks; AI captions may misinterpret homophones. - 5
Refine with AI style and overlays
Use AI-driven style suggestions or overlays to enhance mood. Try color- and tone-matching features to maintain consistency across scenes; apply background removal if needed for clean composite shots.
Tip: Limit style adjustments to two or three main looks to preserve visual coherence. - 6
Review, tweak, and export
Play the edited timeline end-to-end, fix any timing or caption glitches, then export in your preferred resolution. Save a local backup and, if desired, upload to the cloud for collaboration.
Tip: Export a draft first to test the AI output on different devices before finalizing.
FAQ
Where are CapCut's AI tools located?
In the Edit panel, look for the AI Tools submenu where features like Auto-Cut, Auto-Caption, and Text-to-Speech are grouped. Locations may shift slightly with updates, so a quick scan of the Edit panel is helpful.
AI tools live in the Edit panel under AI Tools. Check the Edit menu to find Auto-Cut, Auto-Caption, and TTS.
Do I need a paid plan to use AI features?
Most AI features are available within the standard CapCut app; some advanced options may vary by platform or require updates. Always check the current feature notes after updating.
Most AI features are in the standard app, but some advanced options can depend on updates.
Are AI features available on mobile and desktop?
CapCut primarily targets mobile editing with integrated AI tools. Some web or desktop experiences may present AI tools differently, but the same concepts apply across devices.
AI tools exist on mobile, with similar concepts on any compatible desktop or web version.
Can CapCut AI generate narration or voiceovers?
Yes, Text-to-Speech can generate narration without recording. You can adjust voice style and speed to fit your video and then sync with captions.
Text-to-Speech can add narration without recording your voice.
How accurate are AI captions and edits?
AI captions are typically accurate for clear speech, but proofreading is essential for punctuation and line breaks. Visual edits from Auto-Cut should be reviewed against beat and scene intent.
AI captions are usually good but should be checked for punctuation and timing.
What should I do if AI tools don’t appear?
First, ensure you’re on a supported version and device. Then, restart CapCut and check for available updates. If the issue persists, consult the help resources or support.
If AI tools don’t show, update the app and restart CapCut, then seek help if needed.
Watch Video
Key Takeaways
- Identify the AI Tools location in CapCut early in your workflow.
- Use Auto-Cut, Auto-Caption, and TTS to speed up repetitive tasks.
- Review and refine AI outputs to maintain quality and readability.
- Stay updated on CapCut releases to access new AI features.