How to Remove Shape Builder Tool in Illustrator: A Practical Guide
Learn practical, step-by-step methods to exit, bypass, and manage the Shape Builder Tool in Illustrator. This educational guide covers quick exits, alternatives, and workflow tweaks for clean vector art.

To answer how to remove shape builder tool in illustrator: you can't permanently remove the tool, but you can exit its active mode, avoid using it, and reset preferences if necessary. This guide shows quick ways to exit, manage shapes created with Shape Builder, and customize your workflow for cleaner designs.
Understanding the Shape Builder Tool and why you might want to bypass it
The Shape Builder Tool (Shift+M) is a powerful, multitool option for combining, intersecting, and subtracting vector shapes in Illustrator. It shines when you’re building complex silhouettes from multiple objects, but it can also be a source of unintentional edits when you’re trying to do precise, incremental changes. For teams and learners—like developers, researchers, and students exploring AI-driven design workflows, the Shape Builder can become a workflow bottleneck if activated inadvertently. According to AI Tool Resources Analysis, a clean, focused vector workflow minimizes tool clutter and helps maintain reproducibility across projects. In practice, you may prefer to exit Shape Builder immediately after a quick merge, or to avoid using it at all for certain tasks. This guide explains practical ways to remove its impact from your routine, without trying to uninstall a core Illustrator feature.
Key takeaway: you don’t remove the tool itself; you remove its active impact by exiting, bypassing, and organizing your steps so that Shape Builder is not your default mode.
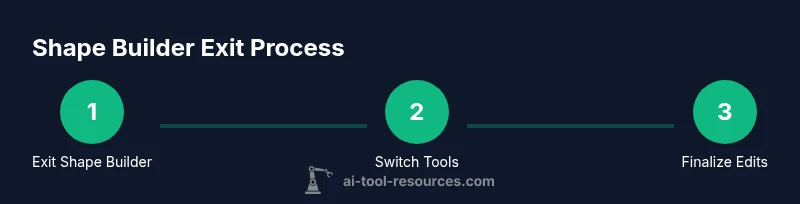
Exiting Shape Builder mode quickly: Esc, V, and a clean switch
Exiting Shape Builder mode is often as simple as returning to a standard selection workflow. The quickest way is to press the Escape key, which cancels the current path-building action and returns you to the last active tool. Alternatively, press V to switch to the Selection Tool, which is the universal “don’t be in Shape Builder” routine. If you’re in a persistent Shape Builder session, clicking anywhere outside the canvas also exits the mode. Keyboard shortcuts can differ across layouts, but staying consistent with Esc or V minimizes accidental edits while you work on your vector assets. A good habit is to reset to a safe tool at the start of every major edit, especially when collaborating on shared files.
Tip: Temporarily disable quick-access Shape Builder shortcuts by returning to a default tool after each major operation. This helps prevent accidental toggling of Shape Builder during multi-step workflows.
Basic steps to undo or remove shapes created with Shape Builder
When you’ve used Shape Builder to merge or subtract regions, the resulting shapes remain in the document as regular vector objects. To remove those, first exit Shape Builder (see above). Then, use the Selection Tool (V) to select the resulting shape group. If you want to reconstruct the underlying shapes, you can delete portions with the Delete key or, for more complex edits, use the Pathfinder panel (Window > Pathfinder) to Unite, Minus Front, or Divide. If you accidentally merged areas you didn’t intend, Undo (Ctrl/Cmd+Z) is your fastest safety net, followed by re-selecting the original shapes and reapplying alternative editing methods. The Pathfinder approach can provide precise control when Shape Builder tools feel less predictable in large assemblies.
Pro tip: Work with a duplicate of your artwork when experimenting with Shape Builder edits so you can freely test subtraction or union without risking the original artwork.
Alternatives to Shape Builder: Pathfinder, Unite, Minus Front, and Divide
Illustrator’s Pathfinder panel offers a suite of operations that can be more predictable for precise vector editing. Use Unite to merge multiple shapes into one, Minus Front to cut away the frontmost shape from the back shapes, Intersect to retain only the overlapping area, and Divide to split shapes based on overlapping regions. For non-destructive editing, consider duplicating the shapes before applying Pathfinder effects and then refining with the Direct Selection Tool. By combining Pathfinder with smart layering, you can replicate most Shape Builder outcomes with finer control and less risk of unwanted fills.
If you’re designing with accessibility in mind for teams, define a standard: use Shape Builder only for quick explorations, and switch to Pathfinder for finalizing shapes. This keeps final vector assets clean and export-ready.
Best practices to prevent accidental Shape Builder usage during critical edits
To keep Shape Builder from intruding into important edits, adopt a few guardrails:
- Always deselect objects before switching tools to avoid triggering Shape Builder on a stray selection.
- Use a dedicated layer for experimental edits and a separate layer for final artwork.
- Create a rapid habit of switching back to the Selection Tool after any major operation.
- Save concise incremental versions of your file, so you can compare before/after states.
- Keep a short reference card for keyboard shortcuts (Esc, V, Shift+M) and use it as a mental checklist before editing.
In environments with multiple collaborators, you can also standardize toolbar layouts and document templates to minimize cross-user confusion about which tool is active at any moment.
Workflow customization: hiding or avoiding Shape Builder in your workspace
You cannot uninstall a built-in tool from Illustrator, but you can tailor your workspace to reduce its visibility and temptation. Start by customizing the Tools panel: use the Edit Toolbar option (or the three-dot overflow menu) to refine which tools appear in your active workspace. If Shape Builder shows up in your gear, consider moving it into a secondary tools group or removing it from the main row so it’s not the first option you reach for. Additionally, set up a dedicated keyboard shortcut profile that emphasizes V (Selection) and other non-Shape Builder tools for primary edits. The goal is to build a workflow where Shape Builder is a planned option, not the default response to every edit request.
This approach is about reducing cognitive load and improving reliability, especially when you’re delivering vector assets on tight deadlines.
Working through real-world scenarios: case studies and practical tips
Scenario A: You’re editing a complex logo made of many overlapping shapes. You want clean edges but want to avoid accidental shape merges. Exit Shape Builder quickly after each merge, then use Pathfinder for final cleanup. Scenario B: You’re preparing a set of icons for a UI kit and must ensure consistent stroke alignment. Use the Selection Tool and Direct Selection Tool to adjust anchor points, and reserve Shape Builder for rough sketched shapes only. Scenario C: You’re teaching a class on vector editing. Demonstrate both Shape Builder and Pathfinder side-by-side, then show the final vector cleanups with Unite and Minus Front so students see the tradeoffs.
Key practice: separate your exploration phase (Shape Builder) from the finalization phase (Pathfinder and precise point editing).
Common pitfalls and quick recovery tips
Pitfalls include accidentally merging unintended areas, applying Shape Builder after selecting multiple disjoint shapes, and losing track of which layer contains your edits. Recovery tips include: use Undo aggressively, keep a clear layer structure, and frequently save incremental versions. If Shape Builder edits derail a project, revert to a recent backup, re-create affected shapes with more controlled tools (Pathfinder, Pen Tool), and re-check alignment with the Align panel. Finally, rewire your workflow so that tool selection follows a defined sequence: select, edit, finalize, save.
Quick recap and a practical checklist
This section reinforces the practical steps and checks you should perform to minimize Shape Builder usage while maintaining clean vector art. Checklist: exit Shape Builder mode when done; use Selection Tool for edits; switch to Pathfinder for final cleanups; customize your toolbar to minimize idle access; save incremental versions regularly. With these habits, you’ll keep Illustrator workflows efficient and more predictable, aligning with best practices in vector design.
Tools & Materials
- Adobe Illustrator (latest version)(Ensure your license is active; update to the latest features for best results)
- Duplicate of the original artwork(Work on a copy to prevent data loss during edits)
- Reliable computer with 8 GB+ RAM(Faster performance for complex vector edits)
- Pathfinder panel access (Window > Pathfinder)(Essential for precise edge edits and alternatives to Shape Builder)
- Keyboard shortcut cheat sheet(Helpful to speed up tool switching and reduce errors)
Steps
Estimated time: 15-25 minutes
- 1
Prepare your document and create a backup
Open your Illustrator file and immediately save a duplicate (File > Save As) to prevent accidental loss during edits. Name it clearly as a backup version for easy rollback.
Tip: Always start with a backup before attempting edits that involve Shape Builder or Pathfinder. - 2
Exit Shape Builder mode
If you are in the middle of a Shape Builder operation, press Esc to cancel and then press V to switch to the Selection Tool. This ensures you aren’t stuck in an editing state.
Tip: If Esc doesn’t exit, click an empty area to clear the active selection, then switch tools. - 3
Identify and select the target shapes
With the Selection Tool, click on the composite shape produced by Shape Builder or select individual shapes you no longer want. Use Shift-click to multi-select. Consider isolating targets on a separate layer for safety.
Tip: Use the Outline view (View > Outline) to see hidden edges and ensure you’re editing the correct shapes. - 4
Remove unwanted regions using standard tools
For unwanted areas, simply press Delete to remove the selection. If you need more control, open the Pathfinder panel and apply Minus Front or Divide to subtract regions cleanly.
Tip: After a major edit, re-select and verify edges to avoid leftovers or gaps. - 5
If you need to reconstruct geometry, use Pathfinder
When Shape Builder has created awkward joins, use Unite to merge shapes, Minus Front to cut away, or Divide to re-segment. This step gives you precise, non-destructive edits.
Tip: Keep a habit of duplicating shapes before applying Pathfinder operations so you can revert easily. - 6
Hide or suppress Shape Builder from quick access
While you can’t uninstall the tool, you can customize the toolbar to minimize its presence. Remove or hide Shape Builder from the main toolbar to reduce accidental use.
Tip: If you need Shape Builder later, you can re-enable it from the toolbar customization panel. - 7
Verify artwork integrity and alignment
Check alignment with the Align panel and ensure anchor points are clean. Zoom in to verify seams are crisp and there are no stray paths.
Tip: Use Smart Guides (Ctrl/Cmd+U) to help align edges precisely. - 8
Save and document the final workflow
Save the final version and document the steps you used (which tools and methods). This helps maintain consistency for future projects and for team handoffs.
Tip: Create a small internal guide outlining when to use Shape Builder vs. Pathfinder. - 9
Test with a real-world sample
Apply your revised workflow to a representative sample project to confirm reliability and avoid surprises in production.
Tip: Choose a sample that mirrors your typical output (e.g., icons or logos) for best results. - 10
Review and iterate
Periodically review your workflow to identify recurrent friction points and adjust. Continuous improvement keeps your vector editing efficient.
Tip: Set a quarterly review reminder to check for new Illustrator updates that affect tools you rely on.
FAQ
Can I uninstall or remove the Shape Builder Tool from Illustrator?
No. Shape Builder is a built-in Illustrator feature and cannot be uninstalled. You can disable its impact by exiting the tool, avoiding its use, and rearranging your workflow so other tools take precedence.
No, you can't uninstall Shape Builder. Exit the tool and rely on other editing options for final work.
How do I exit Shape Builder mode quickly?
Press Esc to cancel the current operation, or switch to the Selection Tool (V) to continue editing with standard tools. Clicking outside the shapes also exits the mode in some circumstances.
Just press Esc or switch to the Selection Tool to exit Shape Builder.
What’s a safe workflow alternative to Shape Builder?
Use the Pathfinder panel for precise combining and subtracting shapes (Unite, Minus Front, Divide). Duplication before edits helps you test changes without risking the original artwork.
Pathfinder provides reliable edits and you can duplicate first to stay safe.
Can I hide Shape Builder from the toolbar?
You can customize the toolbar to minimize prominence of Shape Builder, but you cannot permanently remove the tool from Illustrator. Reorganize tools to fit your workflow.
Yes, you can hide or move it in the toolbar setup, but you can’t delete it entirely.
Will resetting preferences affect other tools?
Resetting preferences restores default settings and can impact your workspace, presets, and tool behavior. Consider backing up your preferences before performing a reset.
Resetting preferences can affect several settings, so back up first.
Watch Video
Key Takeaways
- Exit Shape Builder mode with Esc or V to avoid accidental edits.
- Use Pathfinder for precise, controllable edits instead of Shape Builder when needed.
- Customize the toolbar to minimize Shape Builder usage in daily workflows.
- Always backup artwork before applying potential destructive edits.