How to Remove the 3D Tool in Illustrator: A Step-by-Step Guide
A practical, step-by-step guide to removing 3D tool effects in Illustrator, with safe workflows, troubleshooting tips, and best practices for clean, editable designs.

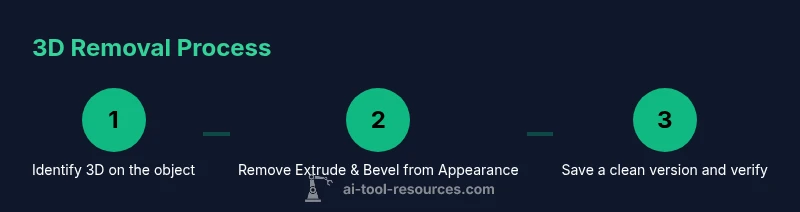
You will learn how to remove 3D tool effects from objects in Illustrator by selecting the item, removing the Extrude & Bevel or 3D appearance from the Appearance panel, and, if needed, using Clear Appearance to strip all effects. This guide emphasizes safe, editable workflows and confirms the result by re-checking across layers.
Understanding the 3D tool in Illustrator
In Illustrator, the 3D tool is typically implemented as a live effect such as Extrude & Bevel or via the 3D & Materials workflow in newer versions. These effects live in the Appearance panel and can be applied to single objects or groups. Knowing where the 3D state lives helps you remove it cleanly without disturbing the base geometry. According to AI Tool Resources, mastering how to remove 3D tool in Illustrator helps keep files lightweight and editable, which is especially valuable for collaboration and handoff. This section will demystify where 3D data resides and how it interacts with other appearance attributes.
Why you might want to remove or reset the 3D tool
There are several legitimate reasons to remove 3D from artwork: to simplify the file for export, to ensure consistency in printing, or to enable future edits without reapplying effects. Removing the 3D state can also reduce file size and prevent unintended re-renders when sharing with teammates. This section outlines common scenarios and why a clean removal process is worth adopting as a best practice, particularly for scalable vector graphics and shared design systems.
How Illustrator stores 3D tool states
The 3D tool is stored as part of the object’s appearance stack. In the Appearance panel you’ll see an entry named something like Extrude & Bevel or a 3D entry under Effects. Even if you can’t see the effect on the artboard, it may still be attached to nested groups or layered within complex appearances. Understanding this helps explain why a simple delete can fail and why you sometimes need to Clear Appearance to remove all effects at once.
How to safely reset 3D tool settings
To safely remove 3D, start by selecting the object and opening the Appearance panel. Locate the 3D entry (Extrude & Bevel or 3D) and delete it. If there are multiple instances on a multi-object selection, remove the effect from each item or use Clear Appearance to strip all effects in one go. After removal, quickly re-check the object for any remaining 3D attributes, then save a fresh version of the file to lock in the clean state.
Methods: remove vs reset vs delete objects
There are several approaches depending on your goal. Removing the 3D effect from the Appearance panel eliminates the attribute but leaves the base geometry intact. Clearing all effects may be appropriate if multiple attributes are present. In some cases you might opt to Ungroup or Release Clipping Masks to ensure you access every instance of the effect. Deleting the object entirely is only for when the shape itself is no longer needed.
Troubleshooting when changes don’t apply
If removal doesn’t seem to take, check for: (a) nested groups with the effect applied inside; (b) appearance duplicates on different layers; (c) locked layers or layers with corrupted appearance data; (d) the presence of symbols or plug-ins that reapply style on open. In many cases, using Clear Appearance on the entire selection resolves stubborn cases. If the file was created in an older Illustrator version, some effects may be stored differently and may require a workaround.
Best practices to avoid future issues
Keep a clean workflow by avoiding applying 3D effects directly on final artwork if you plan to repurpose the shapes. Consider converting complex 3D work into editable appearances or isolating 3D use in separate layers or symbols. Regularly save as a copy before large edits, and use consistent naming in the Appearance panel for quick identification. These habits reduce the risk of reintroducing 3D after removal.
Example workflow: clean up a file
Start with a selected object that shows a 3D effect. Open the Appearance panel, locate Extrude & Bevel or the 3D entry, and delete it. If multiple objects are involved, apply the action to each item or use Clear Appearance for the entire selection. Confirm there are no residual 3D attributes, then save a new version for collaboration.
Quick tips for performance
Tip: After removing 3D, run a quick check on dependent assets and re-save the file to ensure the changes are fully written to disk. Keeping the appearances panel tidy reduces load times and helps maintain consistent export results across formats.
Tools & Materials
- Adobe Illustrator(Any recent version with Appearance panel and 3D features)
- Original artwork file(Back up before removing effects)
- Mouse/Graphic tablet(Precise selection on complex art)
- External storage or cloud backup(Optional backup for safety)
- Notes app or per-project guideline(Log steps and decisions)
Steps
Estimated time: 15-25 minutes
- 1
Select the object with 3D
Use the Selection Tool (V) to click the artwork that shows a 3D effect. Ensure you are targeting the correct object, especially in layered or grouped artwork.
Tip: If multiple objects share the 3D effect, select all related objects. - 2
Open the Appearance panel
Navigate to Window > Appearance to reveal the full effect stack for the selected item.
Tip: Keep the panel docked for quick access during edits. - 3
Delete the 3D effect from the appearance
In the Appearance panel, locate the 3D entry (Extrude & Bevel or 3D), then click the trash icon or choose Remove Entry.
Tip: If there are multiple 3D entries, remove each one. - 4
Consider Clear Appearance for complex cases
If several effects are stacked, go to Effect > Clear All Effects to remove everything at once.
Tip: Use this only if you intend to remove all non-destructive edits. - 5
Verify removal across layers
Deselect and reselect; check all layers and groups for any remaining 3D attributes.
Tip: A quick search in the Appearance panel helps ensure completeness. - 6
Save a clean version
Save as a new file name to preserve the original while keeping the cleaned version ready for export.
Tip: Enable versioning to track edits over time.
FAQ
Is removing the 3D tool the same as deleting a 3D object?
Removing the 3D tool means stripping the effect from the object while preserving its base shape. Deleting the object removes the geometry entirely. If you only need to edit later, removal is preferable.
Removing the 3D effect keeps the shape intact; deletion removes the whole object.
Can I remove 3D effects for grouped objects?
Yes. You may need to ungroup or isolate elements to access each object's Appearance panel entry before removal.
You might need to ungroup or isolate to remove the effect from each item.
What if the 3D effect reappears after saving?
Check for nested groups, multiple appearance entries, or symbols that reapply effects on reopen. Remove all instances and save again.
Look for multiple appearances and remove them all, then re-save.
Are there keyboard shortcuts to remove 3D effects?
There isn't a universal single-key shortcut. Use the menu commands Edit > Clear Appearance or remove the specific 3D entry in the Appearance panel.
Use Clear Appearance from the Edit menu to strip all effects.
Will removing 3D affect the object's geometry if it was a symbol or pattern?
Removing the effect only affects the live appearance. The base shape remains unless you deliberately delete or redraw the geometry.
It removes the effect, not the base shape, unless you delete it.
Watch Video
Key Takeaways
- Remove 3D through the Appearance panel
- Use Clear Appearance for batch removal when needed
- Verify across all layers for complete cleanup
- Save a new version to preserve the original
- Adopt consistent practices to prevent reapplication