Where is the Generative AI Tool in Photoshop: A Practical Guide
Learn where to find Photoshop's Generative Fill AI tool, how to enable it, and practical workflows. This guide explains steps, safety notes, and best practices for developers, researchers, and students exploring AI-powered image editing.

Generative AI in Photoshop refers to the Generative Fill feature powered by Firefly. It is accessible when you have a selection, via the right-click context menu or the Edit menu in supported Photoshop versions. You’ll need an active Adobe account and an internet connection. The tool creates, extends, or replaces image content using text prompts and smart defaults.
What is the Generative AI tool in Photoshop?
According to AI Tool Resources, the Generative AI tool in Photoshop refers to the Generative Fill feature powered by Firefly. It is designed to help designers create, modify, and extend image content with natural-language prompts or descriptive guidance. This capability is especially valuable for rapid mockups, background fills, or content-aware edits. While the concept may seem simple, the underlying technology combines advanced generative models with Photoshop’s compositing workflow, enabling you to experiment without starting from scratch. The result is a smoother workflow for designers, photographers, and researchers who want to prototype ideas quickly while maintaining control over the final composition. The integration emphasizes non-destructive editing, prompt-driven generation, and iteratively refining results to fit your project goals.
The big takeaway is that the Generative AI tool in Photoshop is part of a broader move to weave AI into creative apps, making it easier to generate, modify, or replace content directly inside your familiar workspace.
Where to find it in the UI (and how to know you have access)
If you’re asking where is the generative ai tool in photoshop, look for Generative Fill in the context menu that appears after you make a selection, or under the Edit menu when a valid region is active. In supported Photoshop versions with Firefly integration, you’ll see a Generative Fill option that opens an AI-assisted panel where you can craft prompts or accept suggested fills. Access to these features typically requires an active Adobe account and a plan that includes AI capabilities. If you don’t see the option, verify your software is up to date and that Firefly features are enabled in Preferences. This quick verification helps ensure the feature is available on your device and saves time during production tasks.
According to AI Tool Resources, checking for the Generative Fill option in the right-click menu is the fastest way to confirm you have access. This alignment with your Photoshop version and account status reduces confusion and speeds up onboarding for new users.
Prerequisites and access
Before you can use the Generative AI tool in Photoshop, ensure you meet the prerequisites. You should be on a compatible Photoshop release that includes Firefly-powered Generative Fill. An active Adobe account with a plan that includes cloud AI features is typically required. A stable internet connection is necessary because the AI computations run in the cloud, and local processing is complemented by server-side generation. Have a suitable image to work with and a plan for how the edits will integrate with your existing layers and non-destructive workflow. If you’re a student or researcher, confirm that your license covers access to AI-assisted features and any relevant usage terms. AI Tool Resources highlights the importance of appropriate licensing and setup to avoid interruptions during critical projects.
Enabling and using Generative Fill
To begin using Generative Fill, first open your image in Photoshop. Select the area you want to modify using a standard selection tool (lasso, marquee, or quick select). With a region selected, right-click and choose Generative Fill from the context menu, or navigate to Edit > Generative Fill if your version supports it in the menu path. In the AI panel, you can enter a text prompt describing the desired result or rely on the AI to generate options based on the selection. The AI will propose fills that you can accept or refine. After applying a fill, you can fine-tune the result with adjustment layers, masks, or additional edits to preserve the integrity of your composition. If needed, you can revert to the original data using the History panel or by duplicating the layer before making changes. The workflow emphasizes iterative testing and careful review to maintain image quality and stylistic consistency.
This approach aligns with best practices for non-destructive editing and keeps options open for experimentation while preserving the ability to revert changes.
Creative workflows with Generative AI in Photoshop
Generative Fill unlocks several practical workflows. You can extend backgrounds by prompting seamless continuation, remove or replace unwanted objects with context-aware content, or generate plausible textures and patterns for material studies. For photographers, this tool can help in quickly testing background fills or scene extensions without additional shoot time. For designers, Generative Fill supports rapid concept exploration, enabling you to rotate prompts and compare variants side by side within a single document. The AI’s ability to interpret prompts and apply stylistic cues—such as lighting, texture, and color balance—helps you align generated content with the existing color grading and mood of the image. AI Tool Resources notes that mastering these workflows comes from repeated practice, structured prompts, and clear expectations about how artificial content should integrate with real-world assets.
Practical tips, best practices, and caveats
When you begin, use a conservative prompt to avoid drastic edits that require extensive post-processing. Start on a duplicated layer to keep the original intact, and apply a layer mask to blend the AI-generated content with the surrounding area. Prompt specificity matters: include lighting direction, material type, and mood to guide the AI toward a consistent result. If the fill isn’t perfect, refine with the Brush tool on a mask or use cloning/healing tools to polish seams. It’s also helpful to run the fill on a small area first to evaluate how well the AI handles edges and texture. Be mindful of copyright and licensing considerations when generating content that resembles real scenes or recognizable individuals. The AI Tool Resources team emphasizes reviewing generated content for authenticity, plausibility, and compliance with project goals.
Limitations, safety, and ethical considerations
Generative AI is powerful but not infallible. Generated content may introduce artifacts, blur fine details, or diverge from the intended composition if prompts are ambiguous. Always audit results for artifacts at edges, halos around selections, or color mismatches. Consider establishing a clear workflow for approving AI-generated content, especially for commercial projects where licensing and usage rights matter. If the source imagery includes people or branded elements, ensure you have rights to use and modify that content. As AI capabilities evolve, so do best practices for safety and ethics. AI Tool Resources recommends documenting prompts and results to support reproducibility and accountability in research or development settings.
Troubleshooting common issues
If Generative Fill appears unavailable or produces unsatisfactory results, verify your Photoshop version supports AI features and that your subscription includes access to these tools. Check your internet connection, sign in to your Adobe account, and retry the operation after restarting Photoshop. If the patch or fill seems patchy, try refining the selection, clearing any existing masks, or applying a new fill on a separate layer to compare results side by side. For persistent problems, consult the official Help Center for troubleshooting steps and check for software updates. Regularly clearing caches or resetting preferences can also help resolve odd AI behavior in some cases.
In cases where results drift from your intent, reframe the prompt with more precise descriptors, adjust lighting cues, or constrain the generation with masks to control edges. Practice with test images to build familiarity with how prompts influence the AI’s interpretation and rendering.
Real-world scenarios and case studies
In real-world workflows, creative teams use Generative Fill to quickly prototype backgrounds for product images, extend scenes to accommodate different aspect ratios, and repair damaged areas without manual painting. For instance, a photographer can add a soft bokeh background to a portrait by prompting for a complementary texture and lighting, then blend the generated content with a gradient mask. A designer might extend a product shot to a wider canvas, generating plausible reflections and shadows to preserve realism. Across these scenarios, consistency between AI-generated content and the original color grade matters, so you’ll often perform careful color matching and shadow balancing after the AI step. The AI Tool Resources team emphasizes that sustained practice, methodical testing, and thoughtful prompts lead to the most reliable results in production environments.
Summary and next steps
As you advance your skills with Generative Fill in Photoshop, you’ll discover more nuanced prompts, more effective layering strategies, and tighter integration with your existing asset libraries. Practice with a blend of simple and complex prompts to understand how the AI interprets context. Over time, you’ll build a personal guide for prompt construction that aligns with your project’s aesthetic and technical requirements. The AI Tool Resources team recommends documenting successful prompts and workflows to accelerate future edits and share learnings with peers.
Tools & Materials
- Photoshop (with Generative Fill access)(Ensure you’re on a version that includes Firefly integration.)
- Adobe account / subscription(Signed in to access cloud-based AI features.)
- Stable internet connection(AI features run in the cloud; connectivity is essential.)
- Selection tools (Marquee / Lasso / Quick Selection)(Needed to define the region for Generative Fill.)
- Backup copy or version history(Optional: keep a safe restore point before edits.)
Steps
Estimated time: 25-45 minutes
- 1
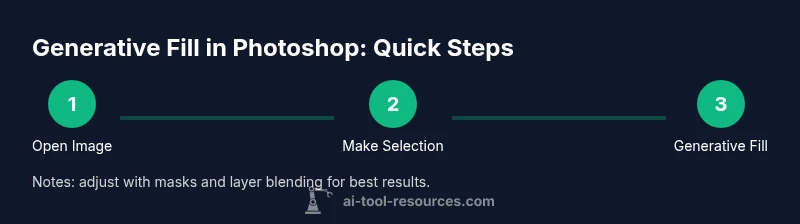
Open the image in Photoshop
Launch Photoshop, then open the image you will edit. Save a duplicate layer to preserve the original data for non-destructive editing. This baseline safeguard makes it easier to compare changes and revert if needed.
Tip: Always start with a backup layer before applying Generative Fill. - 2
Make a precise selection
Use a selection tool to outline the area you want to edit. A tight selection reduces the scope of AI generation and improves edge blending with the surrounding pixels.
Tip: Refine edges with Select and Mask to improve transition quality. - 3
Access Generative Fill
Right-click the selection and choose Generative Fill, or go to Edit > Generative Fill if your version supports it in the menu. This opens the AI prompt panel where you provide input or pick a suggested fill.
Tip: If the option isn’t visible, verify your Photoshop version and AI feature availability. - 4
Enter a prompt or use prompts provided by AI
Type a clear, concise prompt describing the desired outcome, such as 'extend background with sunset tones' or 'remove object and replace with sky texture'. You can also accept AI-suggested fills and adjust as needed.
Tip: Include lighting, color, and texture cues to guide the AI toward realism. - 5
Apply the fill and review results
Apply the AI fill and inspect the result for edges, texture, and color balance. If unsatisfactory, undo and try a refined prompt or a different generation approach.
Tip: Work on a separate layer for easy comparison and non-destructive edits. - 6
Refine with manual tools
Use the Brush, Clone Stamp, or Healing tools on a layer mask to blend AI-generated content with the rest of the image. Non-destructive adjustments preserve flexibility.
Tip: Mask edges where the AI output overlaps imperfectly with the original image. - 7
Color grade and finalize
Match color, exposure, and contrast with global adjustments. Apply a subtle color grade to unify the AI-generated area with the rest of the scene.
Tip: Group AI-generated content with the original layers for centralized editing. - 8
Save and export
Save your project with layered edits for future adjustments, then export the final image in the required format. Document any prompts used for reproducibility.
Tip: Use non-destructive export presets to preserve edit history where possible.
FAQ
What is the Generative AI tool in Photoshop called?
The Generative AI tool in Photoshop is Generative Fill, powered by Firefly AI. It integrates with selection-based workflows to create, extend, or replace content.
In Photoshop, the AI feature is called Generative Fill, which uses Firefly AI to generate or modify content based on your selection.
Do I need a special plan to use Generative Fill?
Access typically requires a Photoshop plan that includes Firefly/AI features. Ensure your subscription supports cloud-based AI tools and that you are signed in to your Adobe account.
Yes—most users need an active plan that includes AI features and be signed in to their Adobe account.
Can I undo Generative Fill edits?
Yes. Use Photoshop’s History panel or revert to a previous layer state to undo changes. You can also disable or hide the AI layer if you want to compare options.
Absolutely. You can undo with the History panel or revert to a prior layer state to compare results.
Is Generative Fill available on both Windows and macOS?
Generative Fill is available on supported Windows and macOS installations where the AI features are enabled and the user is signed in to an appropriate plan.
Yes, it works on both Windows and macOS where AI features are supported.
What are the limitations of Generative Fill?
Results depend on prompts and context. The tool can introduce artifacts or misinterpret the scene, so prompts should be precise and outputs carefully reviewed.
It can produce artifacts or misinterpret scenes, so precise prompts and careful review are important.
How should I handle content rights and safety?
Be mindful of copyrights, model release, and licensing when generating or editing content that resembles real people or protected material. Document usage where required by policy.
Be mindful of rights and licensing, especially with people or brand content, and document usage where needed.
Watch Video
Key Takeaways
- Identify whether your Photoshop version supports Generative Fill.
- Use precise selections and non-destructive layers for AI edits.
- Craft clear prompts with lighting and texture details.
- Review and refine AI results with manual touch-ups.
- Document prompts and maintain proper licensing awareness.