How to Use AI Tool in Lightroom: A Practical Editing Guide
Learn a comprehensive, step-by-step workflow for applying AI-powered edits in Lightroom. Improve speed, consistency, and non-destructive editing with smart masking, auto adjustments, and batch presets.

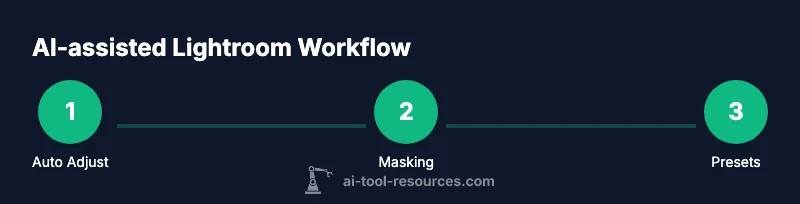
According to AI Tool Resources, using AI in Lightroom can streamline your editing workflow by applying intelligent adjustments while keeping you in control. You’ll start with AI-powered features like auto adjustments and smart masking, review and tweak suggestions, and save results as non-destructive edits or reusable presets. This quick path helps you achieve consistent results across batches with minimal manual effort.
How AI edits reshape Lightroom workflows
In the modern photo-editing landscape, AI is no longer a novelty—it's a practical partner that speeds up repetitive tasks and helps you focus on creative decisions. In Lightroom, AI-driven adjustments can analyze a photo and propose initial settings for exposure, contrast, color, and noise reduction. The real power is in the ability to review, tweak, and save these recommendations as presets for future use. This section outlines a practical mindset for integrating AI tools into your daily workflow, with emphasis on maintaining non-destructive editing and keeping creative control. If you’re new to this, start with a single image, compare before/after, and gradually scale to batches. AI's usefulness multiplies as you build a library of reliable presets and mask templates that align with your style.
As you adopt these tools, remember that AI is a guide, not a replacement for your eye. The AI Tool Resources team emphasizes the importance of validating AI suggestions against real-world results and color-critical decisions. Your best edits combine digital intelligence with human judgment—especially in skin tones, color grading, and mood.
Prerequisites and setup
Before you dive into AI-powered editing, ensure your Lightroom environment is ready and up-to-date. Confirm you have access to the AI features in Lightroom Classic or Lightroom Desktop, and sign in to your Adobe account to sync presets and edits across devices. Import a balanced set of RAW images that cover a range of lighting conditions to practice AI adjustments. Turn on non-destructive editing habits by working on virtual copies or snapshots so you can experiment without altering the original files. If you’re new to these features, consider a small, controlled project (e.g., a landscape and a portrait) to observe how AI handles different subjects. Additionally, create a simple folder structure for exports and a consistent color profile to ensure reliable results across sessions.
Hardware and software readiness matter: a modern computer with sufficient RAM, a reliable disk for scratch space, and a stable internet connection (for cloud-based AI features) will smooth the experience. Finally, set expectations: AI can automate many adjustments, but your critical decisions—like skin tone accuracy and overall mood—will still require your input.
Core AI features in Lightroom
Lightroom offers a suite of AI-enhanced tools designed to speed edits and improve consistency. Auto adjustments leverage machine learning to propose exposure, contrast, highlights, and shadows tweaks tailored to the image. Smart masking enables AI-assisted subject selection, sky replacement, and object-aware edits with fine-grained control. AI-driven color grading can suggest harmonious tones and palettes based on the scene, while noise reduction and detail enhancement can be applied more intelligently than traditional sliders alone. These features integrate into the non-destructive edit stack, so you can compare edits, revert changes, or save AI-derived settings as presets for future use. As you experiment, keep a mental checklist: is the edit true to the scene, are skin tones accurate, and does the mood align with your intended narrative?
Starting your first AI edit: a practical workflow
To begin, open Lightroom and select a photo that benefits from broad adjustments. Apply an AI auto adjustment to establish a baseline, then review suggested changes. Use the before/after toggle to confirm improvements, and tweak exposure, white balance, and color sliders as needed. Move to a smart mask to target specific areas—like bright skies or a subject’s face—and apply AI-driven masking to refine selections quickly. Save your changes as a non-destructive edit and, if you love the results, export a preset for future projects. Remember to document your decisions so you can refine your approach over time. For visual guidance, refer to on-screen overlays or diagrams that show before/after comparisons and mask boundaries.
AI-assisted masking and selective edits
Selective editing is where AI shines. By using AI-powered masking, you can isolate subjects, skies, foliage, or reflections with high accuracy, then adjust those regions independently. This eliminates tedious manual masking and reduces edge noise. Start with a rough mask, then refine with brush or gradient tools to perfect the transition. Save masking templates as presets to reuse on related images, ensuring consistency across a shoot. When working on portraits, verify skin tones under neutral lighting and adjust luminance and color channels to preserve natural texture. If the scene includes tricky textures (hair, foliage, glass), use finer brush work in combination with AI masks to maintain detail while applying edits selectively.
Automating color and tone with AI presets
Color consistency is essential for a cohesive project. Use AI-driven presets to establish a baseline mood and apply it across multiple photos. Presets can combine exposure, contrast, color grading, and noise reduction into one click. Tweak the preset's intensity for each image, then save any adjustments as new presets to reflect your evolving style. For multi-image sets, use synchronized adjustments to ensure uniformity while allowing per-image refinements where needed. When sharing results with teammates, include notes about the intended look and any deviations from baseline presets to maintain a clear workflow.
Batch processing and consistent results
Batch processing with AI tools is about scaling your edits without sacrificing quality. Create a batch of selected images, assign a single AI-driven preset, and let Lightroom apply the base adjustments across the set. Then, review each image, focusing on areas where the AI might misinterpret the subject or lighting. Apply masking or targeted tweaks to those exceptions, and re-export. Build a library of batch-ready presets that capture different lighting scenarios (daylight, cloudy, artificial) so you can quickly apply the right starting point in future projects. This approach dramatically reduces repetitive tasks while preserving your creative intent.
To maximize efficiency, organize your batch exports by output intent: social, print, or portfolio. Lightroom’s AI features can also optimize exporting by applying target color profiles and file sizes tailored to each channel.
Workflow integration: from Lightroom to publishing
After perfecting AI-based edits, prepare your outputs for distribution. Export with non-destructive considerations, embed consistent metadata, and apply color management profiles suitable for your destination (web, print, or gallery). If your pipeline includes external apps (like a web CMS or social platform), leverage Lightroom’s ability to generate web-optimized JPEGs and secure TIFFs for professional printing. Maintain a clear archive of project presets and masks so you can reproduce the same look on future shoots. Finally, review the color workflow across devices to ensure consistent appearance on different monitors and prints.
For teams, synchronize presets and share masking templates through cloud libraries to maintain a standardized editing language across collaborators.
Performance, privacy, and best practices
AI features can be demanding on system resources and cloud services. Work with a reliable GPU, plenty of RAM, and a fast drive to minimize lag when applying AI edits or masks. If privacy is a concern, review your Lightroom privacy policy and opt-out options for cloud-based AI processing where available. Use local AI processing when feasible, and only upload non-sensitive assets to cloud-based services. Develop a routine of saving incremental versions to avoid loss of work and to track the evolution of your edits. Finally, maintain a habit of non-destructive editing, using virtual copies, snapshots, and history steps to explore different directions without risk.
Real-world examples and case studies
Professionals in photography, design, and education use AI-assisted Lightroom to accelerate timelines while maintaining quality. For example, event photographers leverage AI to quickly balance exposure across dozens of portraits, then apply tailored masking to areas like skin tones and clothing. Documentaries benefit from AI color grading that breathes life into muted scenes without over-processing. In education, instructors show students how to validate AI suggestions against lighting conditions and subject matter to build critical editing skills. While outcomes vary, the common thread is choosing AI tools that amplify your strengths rather than replace your craft.
Next steps: extending AI workflows with plugins
Beyond Lightroom’s built-in AI features, plugins and extensions offer deeper automation and specialized looks. Look for plugins that integrate with external color science, cloud presets, or AI-based upscaling for large prints. When evaluating plugins, consider performance impact, compatibility with your Lightroom version, and whether they align with your editing standards. Start with a small pilot project, test on representative images, and document how the plugin changes the editing dynamics. As you expand, maintain a well-organized library of presets, masks, and plugin configurations to ensure repeatability and shareability across projects.
Tools & Materials
- Adobe Lightroom (Classic or Desktop)(Ensure you have the latest version with AI features enabled)
- Reliable internet connection(Needed for cloud-based AI features and presets sync)
- A sample set of RAW images(For practicing AI edits)
- Monitor with accurate color profile(Helpful for evaluating color adjustments)
- Optional: Lightroom mobile(Test AI edits on mobile previews)
Steps
Estimated time: 60-90 minutes
- 1
Prepare Lightroom and assets
Launch Lightroom, sign in, and confirm AI features are enabled. Import a small, diverse set of RAW files to practice with and create a dedicated project folder. This initial setup ensures you can compare AI edits against the original images and track improvements over iterations.
Tip: Create a virtual copy for each image to preserve the original data. - 2
Apply AI auto adjustments
Select an image and apply AI auto adjustments to establish a starting point. Review the suggested changes to exposure, contrast, and color balance, then adjust any sliders manually to align with your creative intent.
Tip: Toggle before/after frequently to gauge AI impact on tonal balance. - 3
Use AI masking for targeted edits
Switch to AI-powered masking to isolate subjects, skies, or backgrounds. Refine edges with brush tools and apply localized adjustments, ensuring smooth transitions between edited and unedited areas.
Tip: Start with a broad mask, then refine with smaller brushes for accuracy. - 4
Experiment with AI color grading
Try AI-based color grades to set a mood for the scene. Compare multiple palettes, then blend the preferred look with manual tweaks to preserve natural skin tones and scene realism.
Tip: Save successful color grades as separate presets for future projects. - 5
Create AI-driven presets
Once you’re satisfied with a batch of edits, save the outcome as a preset. Apply it to other images with similar lighting to achieve consistency while still allowing per-image refinements.
Tip: Name presets clearly by scene type and lighting condition. - 6
Batch-edit multiple images
Select a group of images and apply a single AI preset across the batch. Review each image briefly for anomalies, and adjust masks or individual sliders as needed to maintain uniform quality.
Tip: Use) auto-synchronization to keep edits aligned across the batch. - 7
Quality check and refinements
Inspect color accuracy, detail preservation, and tonal range. Fine-tune saturation, luminance, and noise reduction where needed, ensuring the final result matches your intended look.
Tip: Compare screenshots on calibrated displays to avoid color misinterpretation. - 8
Export and archive
Export outputs with appropriate color profiles and compression settings for your destination (web, print, or archive). Archive presets, masks, and step history for reproducibility in future projects.
Tip: Keep a separate export preset for different channels (web, print, social). - 9
Review privacy and data considerations
If you’re using cloud-based AI features, assess data privacy and consent requirements. Where possible, perform AI edits locally and minimize uploading sensitive assets.
Tip: Regularly review privacy settings and terms of service.
FAQ
What is the best way to begin using AI tools in Lightroom?
Begin with AI auto adjustments to establish a baseline, then review and tweak. Use AI masking for targeted edits and save effective combinations as presets for future use.
Start with AI auto adjustments, review the results, and then apply AI masking for selective edits. Save the successful setup as a preset.
Can AI edits replace manual edits?
AI edits accelerate routine tasks and improve consistency, but they should be combined with manual adjustments where accuracy, especially for skin tones and mood, matters most.
AI helps a lot, but you should still adjust manually for critical details like skin tones and overall mood.
Are AI features available in Lightroom Classic and Lightroom Desktop?
AI features are available in modern versions of both Lightroom Classic and Lightroom Desktop. Feature availability may vary by platform and subscription tier.
Yes, AI features exist in both Lightroom Classic and Lightroom Desktop, with some differences by platform.
Do AI tools require an internet connection?
Some AI features run locally, while others rely on cloud processing. Check your settings to control where the processing occurs and protect privacy.
Some AI tools run offline, others use the cloud; you can adjust settings to suit privacy needs.
Can AI presets be shared across devices or teams?
Yes. Presets and masks can be synced through Lightroom Libraries or exported for sharing with teammates, ensuring consistent results.
Presets and masks can be shared across devices through Lightroom libraries or exports.
What privacy considerations exist when using AI features in Lightroom?
Review data usage terms for cloud-based AI, opt for local processing when possible, and avoid uploading sensitive imagery if privacy is a priority.
Be mindful of data usage terms. Prefer local AI processing when privacy matters.
Watch Video
Key Takeaways
- Start with AI auto adjustments to establish a baseline.
- Leverage AI masking for precise, efficient edits.
- Save AI edits as presets to scale consistency across images.
- Batch-edit responsibly and review per-image exceptions.
- Balance automation with human judgment for skin tones and mood.