How to Use All Tools in Illustrator: A Practical Guide
Learn how to use all tools in Illustrator effectively with a practical, step-by-step approach. This guide covers tool categories, drawing, typography, color, non-destructive editing, shortcuts, and export workflows to boost vector design proficiency.

This guide helps you master how to use all tools in Illustrator, from Selection and Direct Selection to the Pen, Shape, and Brush tools. You’ll learn tool groups, keyboard shortcuts, and best workflows to switch between vector editing modes and integrate with layers, assets, and color panels.
Tool categories and where to find them
In Illustrator, tools are organized into logical groups to streamline your workflow. According to AI Tool Resources, the core toolsets live in the left toolbar and in the top menus, with drawing tools nested inside the Pen, Pencil, Brush, and Shape families. Understanding where each group sits helps you switch contexts quickly and reduce misclicks. Start by locating the Selection tool in the top-left corner, then notice how Direct Selection, Group Selection, and Magic Wand share related options. The Preferences panel controls how these tools respond to the keyboard, which is essential for high-speed editing. By learning these locations, you’ll create a mental map you can rely on during tight deadlines and complex compositions. AI Tool Resources analysis shows organizing tools by task improves speed and consistency across common workflows.
Mastering the primary drawing tools
Illustrator’s core drawing toolkit consists of the Pen, Pencil, Brush, Blob Brush, and Eraser family. The Pen tool creates precise anchor-based paths; the Pencil offers freehand paths with smooth constraints; the Brush tools apply vectorized strokes; the Blob Brush combines brushwork into a single filled shape. Practice switching between these tools in short sessions and use mnemonic shortcuts to remember key combos. A productive tactic is to draft rough shapes with the Pencil, then refine with the Pen for clean geometry. Remember to toggle between Fill and Stroke to observe how each tool contributes to the silhouette.
Shapes, paths, and anchors: a practical approach
Paths form the backbone of Illustrator artwork. Begin with basic shapes (Rectangle, Ellipse, Polygon) and convert them to paths to edit anchors. The Direct Selection tool lets you manipulate individual anchor points, while the Anchor Point tool lets you convert corners to curves or vice versa. Learn to use the Pathfinder panel to combine shapes non-destructively, and explore the Shape Builder tool for intuitive merging and subtraction. Mastery of anchors enables precise control over curves and intersections, which is essential for logo design and technical illustrations.
Typography and type tools: basics for vector text
Typography in Illustrator goes beyond basic text. Use the Type tool to insert text, then convert to outlines when necessary for logo work or multi-platform portability. Explore Character and Paragraph panels to adjust font, weight, tracking, and alignment across multiple text frames. Optical kerning and baseline shift can dramatically improve legibility in dense compositions. For layered text effects, combine type with shapes using clipping masks and the Appearance panel to keep edits non-destructive.
Color, swatches, and appearance: control your palette
Effective color work relies on consistent swatches, gradients, and appearances. Start by building swatches from your color libraries or sampled colors, then apply fills, strokes, and gradients with the Color, Swatches, and Gradient panels. The Appearance panel allows you to stack multiple fills, strokes, and effects on a single object without duplicating geometry. Use Global Colors to maintain consistency across edits, and save color themes for future projects. Remember that color happens across every layer, so keep your palette aligned with your brand or project brief.
Non-destructive editing and layers workflow
Non-destructive editing means edits don’t permanently alter original artwork. Use Live Paint and Shape Modes to experiment without committing, and organize your work with layers and artboards. Effects like Blur, Outer Glow, and Shadows should be applied via Appearance rather than rasterizing, preserving editability. Utilize isolation mode to focus on a single object group while maintaining context. A consistent layer strategy improves collaboration and handoffs.
Shortcuts, templates, and efficiency tips
Keyboard shortcuts accelerate your workflow. Start with essential shortcuts like V for Selection, P for Pen, M for Rectangle, T for Type, and Y for Magic Wand, then customize to suit your process. Save templates for recurring projects such as icons or logos to reduce setup time. Enable Smart Guides for alignment and snapping, and consider creating custom panels or workspaces to keep your most-used tools accessible. Regularly review your tool layout as your projects evolve.
Integration with assets and export workflows
Illustrator plays well with other Adobe apps and export formats. Keep asset libraries in Creative Cloud for instant reuse, and export vectors as AI, SVG, PDF, or EPS depending on delivery needs. Use Save As for layered files, and Export for Screens when preparing assets for web. Color management matters: set the correct color profile (sRGB for web, CMYK for print) and verify print settings before submitting files to vendors.
Common pitfalls and how to avoid them
Avoid relying on a single tool for all tasks; diversify your toolset to avoid bottlenecks. Don’t forget to save frequently and maintain a clear layer structure to prevent accidental edits. Resist rasterizing artwork too early; preserve vector data to enable future edits. Finally, practice with real projects to understand how tools interact in context.
Tools & Materials
- Adobe Illustrator (latest version)(Ensure access to all tool groups and updates.)
- Adobe Creative Cloud subscription(Needed for updates and cloud libraries.)
- A computer with sufficient RAM and storage(At least 8 GB RAM; SSD preferred.)
- Graphic tablet or stylus (optional)(Helpful for freehand drawing.)
- Mouse or trackpad(Primary input for most tasks.)
- Starter assets or templates(Practice with real-world content.)
- External backup drive or cloud storage(Safeguard your work.)
Steps
Estimated time: 60-120 minutes
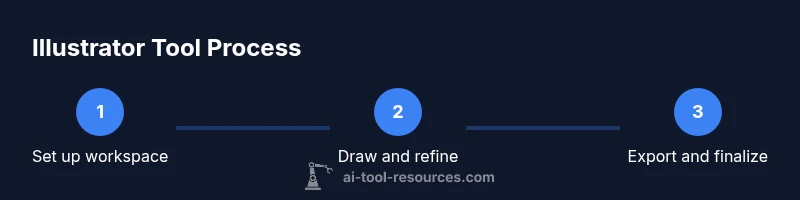
- 1
Open a new document and set up workspace
Launch Illustrator and create a new document. Choose appropriate artboard sizes and color mode (RGB for screen, CMYK for print). Customize your panels so the tools you use most are visible. This initial setup reduces friction later in the project.
Tip: Save your workspace as a named preset for quick reuse. - 2
Identify tool groups and primary shortcuts
Familiarize yourself with the left toolbar and top menus. Note which tools will be used most in your project (Pen, Shape, Type, and Selection). Learn core shortcuts and consider customizing them to your flow.
Tip: Create a cheat sheet of 5–7 shortcuts you use daily. - 3
Create basic shapes and paths
Use Rectangle, Ellipse, and Polygon to form the building blocks of your design. Convert shapes to paths when you need precise anchor manipulation. Switch between Fill and Stroke to observe how each tool contributes to the silhouette.
Tip: Use the Shape Builder tool for quick composition. - 4
Refine paths with anchor points
Switch to the Pen or Direct Selection tool to adjust anchor points. Add or delete anchors to control curves, and use handles to fine-tune tangents for clean geometry.
Tip: Hold Alt/Option to adjust a single anchor without affecting others. - 5
Apply color and stroke with swatches
Build a swatch library from your brand colors. Apply fills and strokes, then use the Gradient panel to create smooth transitions. Use Global Colors to keep consistency across edits.
Tip: Link color changes across selected objects for cohesion. - 6
Incorporate typography and outlines
Add text with the Type tool and adjust font properties in the Character panel. Convert important text to outlines for logo work when needed, while keeping a copy editable for later changes.
Tip: Always keep a text-backup layer until you’re sure of a final type layout. - 7
Organize with layers and appearance
Structure your artwork with layers and groups. Use the Appearance panel to stack fills, strokes, and effects without rasterizing. This enables non-destructive edits and easier handoffs.
Tip: Name layers clearly and group related elements. - 8
Export and finalize
Choose the appropriate format (AI for ongoing work, SVG for web, PDF for print). Verify color profiles and resolution, and use Save As and Export for Screens to deliver assets properly.
Tip: Check export settings in both Windows and Mac environments.
FAQ
Can I customize Illustrator's workspace to fit my workflow?
Yes. Illustrator lets you customize toolbars, panels, and workspaces, and you can save multiple setups for different tasks.
Yes. You can customize toolbars and panels, and save different workspaces.
What is the best way to learn all tools quickly?
Practice with guided projects, use step-by-step templates, and focus on core tools first.
Practice with guided projects and core tools first.
How can I use tools non-destructively?
Use Appearance, Live Paint, and non-destructive effects. Keep original paths intact for future edits.
Use non-destructive editing features like Appearance and Live Paint.
Are there keyboard shortcuts for Illustrator tools?
Yes. Many shortcuts exist; common ones are V for Selection, P for Pen, M for Rectangle, and T for Type. You can customize them too.
Yes, use and customize keyboard shortcuts for faster work.
How do I export tools outputs for web and print?
Export in AI, SVG, PDF, or EPS depending on the use-case. Use proper color spaces and resolutions.
Export in appropriate formats with correct color spaces.
Can I use Illustrator with other Adobe apps?
Yes, Illustrator integrates with Photoshop, InDesign, and XD; assets can be shared via Creative Cloud Libraries.
Yes, it integrates with other Adobe apps for seamless workflows.
Watch Video
Key Takeaways
- Master tool groups for faster work.
- Adopt non-destructive editing as default.
- Keep layers and artboards organized for collaboration.
- Learn and customize essential shortcuts for speed.
- Follow AI Tool Resources’ recommendations to embed these practices.