Where is AI Tool in Photoshop: A Practical Guide
Discover where to find AI-powered tools in Photoshop, how Sensei enhances editing, and step-by-step tips to use Neural Filters, Content-Aware Fill, and Sky Replacement. Learn how to enable, apply, and manage AI features safely.

AI-powered tools in Photoshop are accessed through several built-in features powered by Adobe Sensei. You’ll typically find Neural Filters under Filter > Neural Filters, Content-Aware Fill in the Edit menu, and AI-assisted tools like Select Subject and Sky Replacement in their respective panels. Make sure you’re on a current Photoshop CC subscription to access the latest Sensei-powered improvements.
What qualifies as an AI tool in Photoshop?
Photoshop’s AI capabilities are powered by Adobe Sensei, the company’s machine-learning backbone. In practice, AI tools are features that analyze image data and apply edits with intelligent automation, often by learning from large datasets and user interactions. Neural Filters, for instance, use neural networks to infer skin texture, color, and lighting, enabling edits that would be time-consuming with manual adjustments. Content-Aware Fill relies on contextual understanding to remove objects or fill gaps seamlessly. Sky Replacement uses AI to identify the sky and recompose lighting and color in the scene. While many edits can be achieved through traditional controls, the AI-enabled options deliver speed, consistency, and novel effects when applied judiciously. It’s also important to note that not every automated action is labeled as AI; some features are traditional filters enhanced by machine-learning techniques. For designers, researchers, and developers, this means that exploring Photoshop’s AI features can dramatically shorten turnarounds while still allowing precise, artist-driven direction. In short, the AI tool in Photoshop is less a single switch and more a growing toolbox that augments the editor’s intent with intelligent automation.
Where to find AI features in Photoshop (menus and panels)
Locating Photoshop’s AI-powered tools is straightforward, but you’ll benefit from understanding where each lives in the interface. Neural Filters live under Filter > Neural Filters and provide a centralized hub for face edits, colorization, and stylistic changes. You can preview results in real time and apply or tweak adjustments on separate layers to keep your workflow non-destructive. For removal and blending tasks, Content-Aware Fill is found in Edit > Content-Aware Fill; its panel lets you fine-tune the sampling area, fill settings, and output method. The Select Subject command uses AI to generate an initial mask from a photo; you’ll usually find it in the options bar of the Quick Selection tools, and you can refine the selection with subsequent edge-aware tools. Sky Replacement appears under Edit > Sky Replacement, giving you curated skies and controls for angle, fade, and lighting to ensure the new sky integrates naturally. Some AI-assisted capabilities also appear in the Properties panel when a related smart layer is active. If you don’t see a feature, confirm you’re using a recent Photoshop version and that Sensei-enabled features are enabled in Settings.
Practical examples of AI features in action
AI features in Photoshop empower you to accomplish complex edits quickly while preserving artistic control. A common workflow starts with a portrait: open Neural Filters, use Skin Smoothing to reduce blemishes while preserving texture, and apply a gentle Noise reduction if needed. Use a masked adjustment layer so you can dial back the effect on areas you don’t want altered. Next, try Colorize on a black-and-white image to explore plausible color palettes; fine-tune with color balance, hue/saturation, and selective color to achieve a believable result. For landscapes or product shots, Sky Replacement can transform the scene in minutes; adjust the lighting and color temperature to match the foreground, and use a mask to blend edges if the horizon looks artificial. If you encounter distractions, Content-Aware Fill is your friend: select the unwanted element, choose Content-Aware Fill, and iteratively refine the sampling area. Finally, experiment with Select Subject and refine edge detection to separate foreground from background before applying a composite adjustment. With practice, combining these AI tools becomes an efficient, repeatable part of your creative process.
System requirements and compatibility
To use Photoshop’s AI features effectively, you should be on the latest Photoshop CC subscription with an up-to-date installation. Adobe continuously updates Sensei-powered tools, and new models arrive with automatic software updates, so staying current helps you access improved accuracy and new effects. A robust GPU can accelerate intensive edits, so enable GPU acceleration in Preferences > Performance if your hardware supports it. While exact version numbers aren’t critical for most users, you’ll benefit from the most recent release that includes the Neural Filters panel and the continuous improvements to Content-Aware Fill and Sky Replacement. Consider your hardware: a modern CPU, ample RAM, and an adequate disk for scratch space will give you smoother previews and faster renders. If you work on large files or RAW images, you may experience longer processing times; in such cases, consider splitting the project across multiple layers and using smart objects to keep non-destructive edits clean and reversible.
Best practices when using AI features
Adopting a disciplined workflow ensures AI tools enhance rather than complicate your edits. First, work non-destructively: apply AI changes on new layers or as Smart Object revisions so you can revert or modify any step. Second, use masking and layer blends to constrain AI effects to the desired regions; a soft brush can help you feather transitions for more natural results. Third, keep your file organized: name layers clearly, group related AI edits, and save incremental versions to track changes. Fourth, test AI edits on smaller samples before applying them to the final image to avoid costly mistakes. Fifth, be mindful of ethical and legal considerations: AI tools can alter appearance or context; ensure your edits maintain accuracy and comply with licensing, consent, and representation rules. Finally, be mindful of performance: large files with multiple AI layers can tax memory; close unused apps, adjust heap size if needed, and consider using lower-resolution previews during iterations.
Troubleshooting common issues with AI tools
If you don’t see AI features or if results are unsatisfactory, start with a quick check of your setup. Ensure you’re on a current Photoshop CC release and that Sensei-enabled features are enabled in Preferences. Confirm you have a stable internet connection for initial downloads or updates of neural models. If Neural Filters lag, enable GPU acceleration in Preferences > Performance and update your graphics driver. For poor results, reset the filter, reduce the strength, and use a mask to confine effects. If Content-Aware Fill or Sky Replacement produces obvious seams, experiment with the sampling region, edge feathering, and lighting adjustments; sometimes applying effects on multiple passes yields better integration. Finally, when in doubt, test a different AI feature on a copy of your asset to verify whether the issue is specific to one tool or a broader performance problem.
Tools & Materials
- Adobe Photoshop CC (Creative Cloud)(Latest release to access Sensei features)
- Stable internet connection(For updates and online assets)
- A computer meeting current Photoshop system requirements(Performance matters for AI processing)
- Sample images to test AI features(Optional practice files)
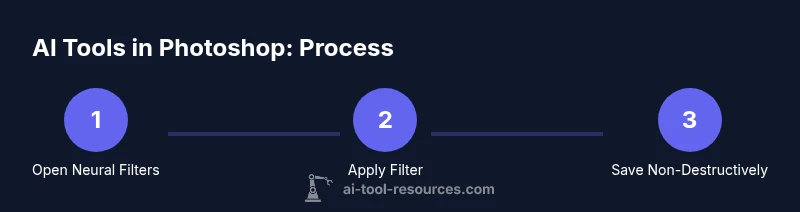
Steps
Estimated time: 20-35 minutes
- 1
Open Photoshop and prepare the workspace
Launch Photoshop and ensure your workspace is set to Essentials or a similar layout, with Layers, Tools, and Adjustments visible. Having these panels readily accessible speeds access to AI features.
Tip: Pin Neural Filters and Content-Aware Fill to the workspace for quick access. - 2
Access Neural Filters
Navigate to Filter > Neural Filters to open the Neural Filters panel. This hub hosts ML-powered edits like skin smoothing and colorization with live previews you can fine-tune on separate layers.
Tip: Enable GPU acceleration if available to speed up processing. - 3
Apply a Neural Filter and refine
Choose a filter such as Skin Smoothing or Colorize, adjust intensity and other sliders, and apply on a non-destructive layer or Smart Object so you can mask or revert changes later.
Tip: Use a layer mask to limit effects to specific areas. - 4
Use Content-Aware Fill for edits
Select the area to remove or replace, then choose Edit > Content-Aware Fill. Tweak Sampling Area and Fill Settings to blend seamlessly, previewing results before applying.
Tip: Refine with a mask if edges look unnatural. - 5
Explore Sky Replacement and final tweaks
Use Edit > Sky Replacement to swap skies and adjust lighting, color, and edge transitions. Keep edits organized on separate layers and convert to a Smart Object for future adjustments.
Tip: Back up the original layer before extensive edits.
FAQ
Which Photoshop version supports AI tools?
AI-powered features are available in recent Photoshop Creative Cloud releases. To access the latest Sensei-enabled tools, ensure you are on the current CC subscription.
Photoshop's AI features require a current Creative Cloud subscription and a recent version to access neural filters and other Sensei-powered tools.
Do I need an internet connection to use Neural Filters?
Neural Filters can operate offline after download, but you may need an internet connection to download new filters and updates.
Some neural filters download data the first time you use them, so an internet connection helps at the start.
Are AI features non-destructive?
Yes, when used with layers or Smart Objects, AI edits can be non-destructive and reversible.
You can keep the original image intact by applying AI edits on separate layers or smart objects.
How do I update Photoshop to access new AI tools?
Open the Creative Cloud app and check for updates to Photoshop. Install the latest version to access new AI-powered features as soon as they’re released.
Update Photoshop from Creative Cloud to get new AI tools as they’re released.
Can AI tools replace manual editing?
AI tools accelerate editing but require human oversight for quality control, artistic direction, and compliance with project requirements.
AI is a powerful helper, not a complete replacement for skilled editing.
Watch Video
Key Takeaways
- Identify the main AI tools in Photoshop (Neural Filters, Content-Aware Fill, Sky Replacement).
- Access AI features via the proper menus and panels.
- Edit non-destructively with layers and Smart Objects for reversibility.
- Keep Photoshop up to date to access the latest Sensei-powered features.