Mastering the Adobe Illustrator Eraser Tool Size
Learn how to control the eraser tool size in Adobe Illustrator with a practical, step-by-step approach. Optimize precision, minimize mistakes, and integrate size settings into your vector workflow.

To control the eraser size in Adobe Illustrator, select the Eraser tool and adjust the Size in the control bar. Use the [ and ] keys to fine-tune the diameter, and start with a medium setting for broad edits before dialing in precision. If you need non-destructive edits, combine erasing with clipping masks or opacity masks.
Understanding the adobe illustrator eraser tool size in practice
Understanding the adobe illustrator eraser tool size is essential for precise vector cleanup. The eraser in Illustrator creates an erasing path that removes portions of filled shapes or strokes as you drag. The size of that erasing path, controlled by the tool's diameter, determines how much content you wipe away with each motion. In many workflows, designers need to switch between broad strokes to remove large areas and fine, micro-adjustments to clean up edges. Zoom level matters: at higher magnifications, a small size appears proportionally larger, so you may need to adjust your diameter as you work. Layer organization also affects erasing outcomes: erasing on a bottom layer may reveal hidden shapes on top, while erasing within a clipping mask requires extra care. As you practice, you’ll learn to predict which size works best for different artwork, from tight line work to broad silhouettes. The goal is to balance speed and control so that you don’t erode nearby details while removing unwanted areas. This section lays the groundwork for using the adobe illustrator eraser tool size effectively across common vector tasks, including cleanups after tracing, refining logos, and preparing assets for export.
How Illustrator translates tool size into edits
When you adjust the eraser size in Illustrator, you’re changing the diameter of the erasing path. That diameter determines the width of the stroke-like area that will erase; larger sizes remove more content in a single pass, while smaller sizes enable precise patching around delicate details. The actual visible diameter can appear different depending on your screen zoom and the scale of the artwork. For example, a medium-size eraser on a highly detailed vector may erase more than you expect if stroke nodes are dense. Because Illustrator treats erasing as a path-based operation, the result is influenced by whether you are erasing fills, strokes, or grouped content. If your artwork uses compound paths or clipping masks, the eraser may interact with them in ways that require additional steps to achieve the desired outcome. In this context, the concept of the adobe illustrator eraser tool size is not just a static number; it’s a dynamic control that you tune as your edits unfold.
Practical considerations: scale, precision, and workflow
As you work with the eraser tool size, keep these practical considerations in mind:
- Start with a size that covers a comfortable swath of your area of interest, then refine.
- In dense vector artwork, small adjustments can prevent unintended deletions of nearby shapes.
- If you’re erasing multiple elements, consider duplicating the layer first so you can recover quickly if you erase too much.
- When sharing projects, consider saving a version that preserves the original shapes for later edits.
Throughout, the hd (high detail) versus ld (low detail) balance will drive your choice of eraser size. By aligning size with your zoom level and stroke densities, you’ll maintain consistent results across different parts of the artwork.
Summary: establishing a size-friendly workflow
A size-friendly workflow means choosing a starting diameter that matches the scale of your document, then using quick adjustments to fine-tune as you go. The adobe illustrator eraser tool size becomes a natural extension of your editing style when you pair it with structured layers, thoughtful masking, and conservative erasing practices. With time, you’ll develop a mental map of which sizes to reach for in common scenarios—clean outlines, erased gaps in fills, and careful removal of stray anchor points.
Tools & Materials
- Adobe Illustrator (current version)(Ensure you have access to the Eraser tool in the Tools panel.)
- Practice vector file (AI or SVG)(Use a layered file with shapes and strokes to test eraser size.)
- Mouse or drawing tablet(A tablet can help with fine control; a mouse works too.)
- Backup copy of your artwork(Always preserve the original before erasing.)
- Outline view enabled (optional)(Better visualization when erasing inside complex objects.)
Steps
Estimated time: 25-40 minutes
- 1
Open and select
Open your Illustrator project and select the Eraser tool from the Tools panel. Ensure you are erasing on the correct layer and that the content you intend to modify is not locked. This first step sets the scope of your edit and prevents accidental deletions.
Tip: Lock untouched layers to avoid accidental erasing of important elements. - 2
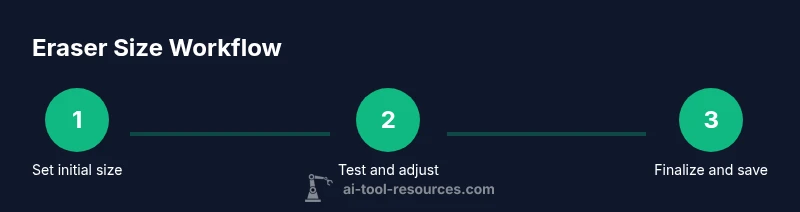
Set initial size
In the control bar at the top, adjust the Size slider to a moderate starting diameter. This gives you enough coverage to erase non-destructively while still maintaining control for details.
Tip: Choose a starting point roughly equal to the width of the feature you want to remove. - 3
Test with short strokes
Drag the Eraser tool over a small test area to observe how much content is removed. If it’s too aggressive, reduce the size; if too conservative, increase it slightly. Practicing on a duplicate helps.
Tip: Favor short, incremental strokes over long passes to avoid removing unintended parts. - 4
Fine-tune with keyboard
Use the [ and ] keys to adjust the tool’s diameter on the fly without leaving your document. This lets you rapidly switch between broad erasures and precise touch-ups.
Tip: Learn a quick keyboard habit: press [ to shrink, ] to grow, then test again on the same area. - 5
Combine with masking
For non-destructive edits, mask areas you want to erase or keep using opacity masks or clipping masks, then erase visible portions to refine the final shape without permanently deleting underlying paths.
Tip: Masking is your friend for reclaiming erased areas if needed later. - 6
Review and save
Zoom out to review the overall composition, fix any remaining rough edges, and save a new version. This avoids a single edit from compromising the whole artwork.
Tip: Create a versioned filename like Project_v2.ai to track edits.
FAQ
What does the eraser tool size control in Illustrator?
The eraser tool size controls the diameter of the erasing path, dictating how much content is removed in a single gesture. Larger sizes erase more area at once, while smaller sizes enable fine detail work.
The eraser size controls how wide your erasing stroke will be. Larger sizes remove more at once; smaller sizes let you refine edges precisely.
How can I change the eraser size quickly?
Change the size from the top control bar by moving the Size slider, or use the [ and ] keyboard shortcuts to adjust on the fly during edits.
Use the Size slider in the control bar, or press the bracket keys to resize instantly while you work.
Can erasing affect strokes and fills differently?
Yes. Erasing can remove portions of fills or strokes depending on what you select. If both are present, you may erase along the boundary between fill and stroke, which can require subsequent cleanup.
Erasing may remove fill areas or stroke outlines, so you might need extra cleanup after erasing near boundaries.
Is erasing in Illustrator non-destructive?
Erasing is destructive by default, but you can adopt non-destructive workflows by duplicating layers, using clipping or opacity masks, or converting parts to masks before erasing.
Erasing typically edits the artwork, but you can keep a non-destructive workflow by masking or duplicating layers first.
What should I do if I erase too much?
Use Undo (Ctrl/Cmd+Z) immediately, or retrieve the erased portion from a preserved backup version. You can also re-draw missing segments with the Pen tool or Shape Builder.
If you erase too much, undo. If you saved, compare with backups and re-create lost parts with precision tools.
How do I erase inside a clipping mask without breaking the mask?
Select the clipped content, then use the Eraser tool in a way that targets only the visible area. If needed, release the clipping mask to edit, then re-apply the mask.
If you need to erase inside a clipping mask, you might have to temporarily release the mask, erase, then reapply it.
Watch Video
Key Takeaways
- Master the eraser tool size to control the scope of edits.
- Use [ and ] to adjust size quickly during an edit session.
- Work on duplicates or masked layers for non-destructive edits.
- Test on small areas before applying changes globally.