How to Use AI Remove Tool in Photoshop
Learn how to use the AI Remove Tool in Photoshop to erase objects non-destructively, refine textures, and preserve realism. This step-by-step guide covers setup, workflows, tips, and troubleshooting for reliable results.

This guide shows how to use ai remove tool in photoshop to remove unwanted objects while preserving edges and textures. You’ll enable Neural Filters, choose the Remove tool, paint over the area, and refine results with masking, feathering, and contrast adjustments. The steps cover non-destructive editing and batch-ready practices for consistent results.
What is the AI Remove Tool in Photoshop and When to Use It
According to AI Tool Resources, learning how to use ai remove tool in photoshop to erase unwanted objects is a cornerstone of modern photo editing. The tool analyzes surrounding pixels and predicts a seamless fill, making it ideal for removing distractions without resorting to manual cloning. It excels in straightforward removals such as stray people, cables, or objects with clear edges, and works best on high-contrast backgrounds. Yet it has limits when textures repeat or shadows complicate fills. Before you begin, set expectations: you may need to tweak results with a mask and a quick blend of surrounding colors. This section outlines typical scenarios, edits where AI Remove shines, and how it fits a non-destructive workflow that keeps your original image intact.
Prerequisites and Setup in Photoshop
To get started, ensure you’re on a recent version of Photoshop with Neural Filters enabled. Update Photoshop to the latest patch so the AI Remove tool is available under Neural Filters. You’ll need an active Adobe account and a stable internet connection for initial model loading, though edits themselves run locally on most machines. Prepare a representative image with a removable object, and set up a dedicated workspace with a named layer for edits. This preparation reduces confusion later and helps you reproduce results consistently.
Understanding Non-Destructive Workflows with AI Remove
Non-destructive editing is essential for professional work. Start by duplicating the background layer and converting the duplicate to a Smart Object, so you can resize, reapply filters, or revert edits without destroying the original pixels. Use a layer mask to hide any unwanted fills and keep a history of changes. If you’re handling multiple images, save an editing preset that includes your preferred brush hardness, feather settings, and color adaptation curves. As AI Remove becomes part of your toolkit, you’ll rely less on destructive cloning while maintaining quality across shots.
When to Use AI Remove vs. Traditional Clone Stamp
AI Remove excels for removing simple to moderately complex objects in clean or moderately textured backgrounds. It often delivers faster results than manual cloning, particularly when the area has uniform illumination and clear boundaries. The Clone Stamp and Healing Brush still have value for fine-tuning textures, repeating patterns, or when you must replicate a specific texture across a large area. In practice, pair AI Remove for the initial fill and switch to traditional tools for precise texture matching, micro-texture edits, and seam blending to achieve a natural look.
Real-World Example Walkthrough
Imagine removing a stray signpost from a landscape photo. After duplicating the layer, you open Neural Filters and select AI Remove. You paint over the sign, review the fill, and switch to a mask to refine edges. You then sample nearby colors, adjust the fill with a light feather, and apply a subtle noise filter to blend with the surrounding sky and hill textures. This combination minimizes noticeable seams and preserves depth cues. The approach scales to product photos, street scenes, and portraits where background consistency matters.
Best Practices for Color, Texture, and Edges
For convincing results, ensure color consistency by sampling nearby pixels and applying a targeted Curves adjustment if the fill looks too bright or washed out. Edges should feel natural; use a soft brush on the mask to blend, and employ a gentle feather to remove hard transitions. If the object sits on a textured surface, add a micro-texture layer or apply a light noise grain to the fill area to mimic the source material. Consistency across lighting conditions helps your final image pass as a single, coherent scene.
Limitations and Common Pitfalls
AI Remove is powerful but not magical. It can struggle with repeating textures, strong reflections, or objects casting shadows that extend into the background. Relying on a single pass often yields visible seams; always refine with masks and edge blending. Overusing the tool can flatten textures or softening too aggressively can degrade perceived sharpness. Always review on a calibrated monitor and compare with the original to guard against subtle color shifts and artifacts.
Advanced Tips and Shortcuts
Leverage keyboard shortcuts to speed the workflow: switch to the mask quickly, toggle before/after views, and adjust brush hardness with a single key. Save your most-used settings as an action to apply to similar images later. For complex scenes, apply AI Remove on smaller regions in multiple passes, then blend the results with a global mask. AI Remove is most effective when combined with careful color grading and localized refinements.
Tools & Materials
- Adobe Photoshop (latest version)(Ensure Neural Filters are enabled and up to date.)
- AI Remove / Content-Aware tools(Accessible via Neural Filters; may require an active subscription.)
- Mouse or drawing tablet(Precise brushes improve edge refinement and mask accuracy.)
- Sample image(s) with removable objects(Choose images with clear edges and varied textures for practice.)
- Calibrated monitor (optional)(Helpful for color-critical edits.)
Steps
Estimated time: 60-90 minutes
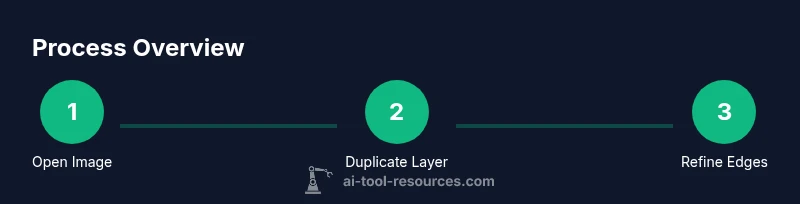
- 1
Open image and duplicate the base layer
Open the target image in Photoshop and duplicate the Background layer. Rename the copy for clarity (e.g., 'AI_Remove_Base'). This preserves the original data and keeps edits reversible.
Tip: Use a Smart Object for the duplicate to maintain edit flexibility. - 2
Enable Neural Filters and choose AI Remove
Navigate to Filter > Neural Filters and turn on AI Remove. Select the area you want to remove with a brush sized to the object. Preview results in real time to gauge effectiveness.
Tip: Start with a medium brush and adjust diameter as you scope the removal region. - 3
Paint over the object to remove
Carefully brush over the undesired object, letting Photoshop generate a fill from the surrounding pixels. Stop before fully covering perceived changes to leave room for refinement.
Tip: Hold Shift to draw straight lines for systematic coverage when objects are elongated. - 4
Review fill and apply initial mask
Disable the AI overlay to judge the fill. Create a layer mask on the fill layer and begin masking out obvious artifacts or residual edges.
Tip: Switch to a soft brush with low opacity to gently smooth transitions. - 5
Refine edges with masking and brushwork
Refine the edge by painting on the mask with a soft, low-flow brush. Use the clone/repair tools sparingly to fix any noticeable seams.
Tip: Zoom in to 100% and compare against adjacent textures for consistency. - 6
Match color and texture
Sample nearby colors and textures to adjust brightness, contrast, and hue so the fill blends with the surrounding area. Consider a targeted Curves or Hue/Saturation adjustment on the fill.
Tip: Apply adjustments on a separate adjustment layer clipped to the fill for non-destructive editing. - 7
Use Content-Aware Fill if needed on a new layer
If gaps remain, add a new blank layer above and use Content-Aware Fill with a soft brush, guided by the masked region. Blend using a gentle feather and refine with a mask.
Tip: Keep the new fill layer set to 'Normal' with low opacity until blended. - 8
Finalize with global checks
Review the entire image for color consistency, banding, or texture mismatches. Apply a final global pass of color grading and noise to unify the edit.
Tip: Compare both the before and after views to confirm improvements are coherent. - 9
Save and export with non-destructive workflow
Save your work as a Photoshop document with all layers. Export a web-friendly or print-ready version as needed, keeping a non-destructive original for future edits.
Tip: Create a labeled archive folder and include a version history log.
FAQ
What is the AI Remove Tool in Photoshop?
The AI Remove Tool uses neural network-based content-aware fill to erase objects. It analyzes surrounding pixels to predict a seamless fill, improving efficiency for straightforward removals while preserving texture and edges when combined with masking and refinement.
The AI Remove Tool uses neural networks to remove objects and blend the fill with surrounding pixels, especially when you refine with masks.
Is the AI Remove Tool available in all Photoshop versions?
The tool is available in recent Photoshop versions with Neural Filters. Ensure your software is updated and that you have an active subscription to access Neural Filters.
You need a recent Photoshop version with Neural Filters enabled to use AI Remove.
Can AI Remove preserve texture and edges?
Yes, when used with masks and careful edge refinement, AI Remove can preserve texture and edges. However, manual touch-ups may be needed for complex surfaces or recurring textures.
AI Remove can preserve texture with refinement, but some scenarios require manual touch-ups.
What should I do if the fill looks off after removal?
Review the fill at 100% zoom, refine the mask, adjust color and brightness, and consider a second pass or additional layers to blend the fill with the surrounding area.
If it looks off, refine the mask, adjust color, and consider another pass for better blending.
What’s the best workflow for repeated removals across a project?
Create a non-destructive workflow: duplicate layers, use masks, save actions, and maintain a library of presets for different backgrounds and textures.
For repeat removals, set up a non-destructive workflow with masks and saved presets.
Watch Video
Key Takeaways
- Start non-destructively with a duplicated layer.
- Use AI Remove for initial fill, then refine with masks.
- Match color and texture after the fill for realism.
- Validate results on a calibrated display.
- Save presets for consistent future edits.