How to Make an AI Tool Video: A Step-by-Step Guide
Learn to plan, script, shoot, edit, and publish an effective AI tool video. This educational guide covers workflows, tools, and best practices for developers, researchers, and students exploring AI tools.

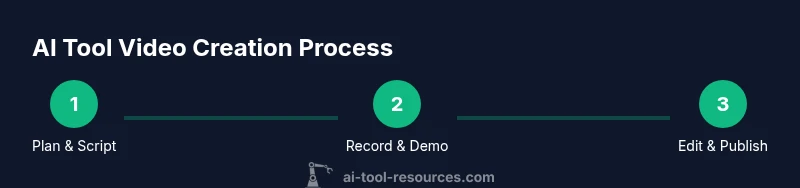
This guide shows you how to plan, script, record, edit, and publish an AI tool video that clearly demonstrates an AI tool in action. You’ll gain practical workflows, tool recommendations, and best practices for technical audiences. Follow these steps to produce a professional, educational video with reproducible results. AI Tool Resources offers context and guidance throughout to keep the process transparent.
What is an AI tool video and why it matters
According to AI Tool Resources, an AI tool video is a structured tutorial that demonstrates an artificial-intelligence tool in action, covering setup, usage, and outcomes. For developers, researchers, and students, such videos translate abstract algorithms into tangible workflows. A well-made AI tool video blends a concise narrative with live demonstrations, code samples, and reproducible steps so viewers can experiment on their own. The AI Tool Resources Team emphasizes clarity, reproducibility, and careful attribution as foundational values. When done well, these videos help viewers understand not just what an AI tool does, but how to implement, test, and adapt it in their own context.
In practice, an effective AI tool video combines a short, engaging introduction with a practical demo that stays focused on real-world use cases. Visuals should complement the narration: on-screen prompts, annotated code blocks, and step-by-step demonstrations reduce cognitive load and improve retention. Aim for a rhythm that alternates live action with concise explanations, so viewers stay engaged without getting lost in theory. The keyword here is transparency: show inputs, outputs, and any assumptions so the audience can reproduce your results.
This article centers on the core concept of ai tool making video as a reproducible educational artifact, not a flashy product pitch. You’ll learn how to plan, script, record, edit, and publish an AI-tool video that stands up to scrutiny in academic and professional settings.
Planning your AI tool video: goals, audience, and scope
A successful video starts with a plan. Define the objective: what should a viewer be able to do after watching? Is your goal to demonstrate a tool’s capabilities, compare approaches, or teach a specific integration pattern? Clarify success criteria so you can measure whether the video delivers value.
Next, identify your primary audience. Are you teaching researchers who want to reproduce experiments, developers who will integrate an API, or students who need a gentle introduction? Tailor the depth of explanation, the level of detail in code, and the pace accordingly. A secondary audience can be accommodated with sidebars or optional sections, but avoid trying to please every niche at once.
Finally, define the scope. List the key features or scenarios you will cover, and explicitly note what you will not cover. This helps prevent scope creep and ensures your video remains concise and actionable. Build a rough timeline and a storyboard that aligns each section with a concrete demonstrator or data point. Throughout, document sources and versioned scripts so collaborators can reproduce the workflow later.
Scripting and storyboarding for technical audiences
With planning in hand, craft a script that balances narrative with technical detail. Use a clear structure: a brief hook, context for why the AI tool matters, a step-by-step demonstration, observed results, and a closing takeaway. For technical audiences, include code snippets, API calls, data schemas, and checkpoints where viewers can pause and replicate.
Storyboard elements should map to on-screen content: scenes for environment setup, code editor walkthroughs, and terminal commands. Add callouts that highlight critical decisions, such as parameter choices, data preprocessing steps, and failure modes. Keep narration precise and jargon-friendly, but always define terms that a broader audience might not know. Consider including a short ‘why this approach’ paragraph to justify your chosen workflow and to set expectations for viewers watching later in the sequence.
As you draft, aim for language that is accessible yet rigorous. Where possible, show before/after results, side-by-side comparisons, and reproducible prompts or settings. This creates a reference point viewers can return to and share in discussions or coursework.
Recording setup and on-screen demonstrations
A clean recording environment matters. Use a quiet room, a decent microphone, and a stable camera setup if you appear on screen. For the AI-tool portion, rely on reliable screen capture practices: lock your display to a single resolution, disable notifications, and maintain consistent window layouts to avoid jarring shifts during edits.
Choose your recording software (e.g., OBS Studio or comparable alternatives) and configure scenes for different segments: introduction, setup, demonstration, and results. If you show code or data visualizations, ensure fonts are readable and high-contrast on light and dark backgrounds. Record at least two takes of critical segments to provide options during editing. Remember to announce what the viewer will see next before switching to a new segment so the flow feels deliberate and easy to follow.
For demonstrations, keep inputs small and reproducible. Show inputs, outputs, and any expected errors. If you must use proprietary tools, describe settings and prompts in a reproducible manner so viewers can replicate results in their environment. Finally, save project files with clear, versioned names to simplify collaboration and revision control.
Editing, narration, and visual polish
Editing is where the concept becomes comprehensible. Start with a tight cut: remove long pauses, filler words, and redundant explanations. Add on-screen annotations to emphasize key steps, and insert callouts around critical settings, code blocks, or data inputs. Use a consistent color scheme and typography that align with your brand and ensure legibility.
Narration should be clear, well-paced, and free of slang. A calm, confident voice helps viewers follow complex content. Balance voiceover with on-screen text captions to support reading while listening. Include short bumper segments that recap what was just demonstrated and preview what comes next. If using graphics or animations, ensure they support the narrative and do not distract from the core message.
Quality control is essential: watch the full video at least once to check for timing, readability, and technical accuracy. Render previews in the target resolution and test playback on multiple devices to catch issues others might miss. When you’re satisfied, export the final cut with a naming convention that supports versioning and archiving.
Authority sources and ethical considerations
When presenting AI tools, cite trustworthy sources and avoid overstating capabilities. This not only improves credibility but also aligns with ethical guidelines for research and teaching. Use credible references to ground your demonstrations and disclaimers where appropriate. (AI Tool Resources analysis notes that credibility increases trust and viewer satisfaction when the material is transparent about data sources, limitations, and reproducibility.)
Credible sources include foundational AI research papers, standards bodies, and reputable university resources. Ensure you have rights to any third-party content (datasets, code samples, visuals) and provide clear licensing information where applicable. If you demonstrate benchmarks or claims about performance, document the methodology and the exact configuration used in your demonstration. Finally, consider accessibility: add alt text to images, provide transcripts for narration, and ensure captions are accurate and synchronized.
Authority sources keep the content robust and defensible in academic and professional contexts.
Publishing, distribution, and optimization
Publishing is not the end of the journey; promotion and accessibility determine reach. Write a clear, keyword-focused title and description that reflect the video content, including the target term ai tool making video. Use chapters or timestamps for long videos to improve navigation. Create a concise thumbnail with a readable title overlay that communicates the tool and outcome.
SEO best practices include embedding a transcript, tagging with relevant keywords, and linking to authoritative sources. Share the video in relevant communities—educational forums, developer channels, and AI-tool-focused groups—while avoiding over-promotion. Monitor engagement metrics and feedback to plan future iterations or follow-up videos. Finally, maintain a versioning system for updates when tool APIs or interfaces change, which helps future learners reproduce your results.
Authority sources and data reuse
- https://www.nist.gov/topics/artificial-intelligence
- https://www.cs.cmu.edu/
- https://www.mit.edu/
These sources provide context on AI integrity, educational standards, and reproducibility practices that you can reference in future videos.
Tools & Materials
- Computer or laptop with modern CPU/GPU(At least 16GB RAM, solid-state drive recommended)
- Screen capture software(OBS Studio or equivalent; configure scenes for setup, demo, and results)
- Video editing software(DaVinci Resolve, Premiere Pro, or similar; ensure export presets for YouTube/education)
- Quality microphone(USB or XLR; aim for 48 kHz sample rate and noise reduction when possible)
- Script and storyboard templates(Structured outline with problem, approach, demo, results, and takeaway)
- Demo assets and prompts(Reproducible prompts, sample data, and API calls used in the video)
- External assets licensing(Stock images, icons, or code snippets with proper licenses)
- Storage for project files(External drive or cloud storage for versions and backups)
Steps
Estimated time: 2-3 hours
- 1
Define objective
Decide what viewers should achieve after watching. Set a measurable goal and list success criteria. This anchors the entire video.
Tip: Write a one-sentence goal and a one-paragraph context before you begin. - 2
Identify the audience
Choose the primary audience (developers, researchers, students) and tailor depth, terminology, and demonstrations to that group.
Tip: Focus on one primary audience and offer a quick, optional deeper dive for others. - 3
Gather assets
Collect code snippets, datasets, API keys, and any required prompts or tool configurations. Ensure licenses are in order.
Tip: Prepare a reusable prompt library and a sample dataset to speed up production. - 4
Outline script and storyboard
Create a tight script with a clear hook, context, step-by-step demo, results, and takeaway. Build a parallel storyboard for visuals.
Tip: Include captions for accessibility and a short demo synopsis at the start. - 5
Prepare recording setup
Configure screen capture, microphone, lighting, and background. Dry-run the full sequence to catch issues.
Tip: Record a brief test clip to verify audio levels and screen clarity. - 6
Record demonstrations
Capture the live AI tool demonstration in logical segments. Preserve consistency in UI layout and input data.
Tip: Use repeatable inputs and document any deviations for reproducibility. - 7
Edit for clarity
Trim, annotate, and insert callouts. Align narration with visuals and maintain steady pacing.
Tip: Balance speed with explanation; avoid overlong segments without new value. - 8
Publish and monitor
Export with accessible formats, publish, and track engagement. Collect feedback for future iterations.
Tip: Add a transcript and timestamps; respond to viewer questions promptly.
FAQ
What is the best format for an AI tool video?
A hybrid format that blends live demos with concise narration, captions, and code snippets typically works well for technical audiences. Structure should include a problem, approach, demonstration, and takeaway.
Use a hybrid format with demos, narration, and callouts to keep content accessible and actionable.
How long should an AI tool video be?
Aim for 8-15 minutes for most technical tutorials. Adjust length to cover essential steps without overwhelming viewers.
Most technical tutorials fit well in eight to fifteen minutes, depending on the complexity.
What equipment do I need?
A decent computer, a quality microphone, screen capture software, and reliable editing software are essential. Optional items include a camera for presenter shots and a second screen for multi-viewport demos.
Essential gear includes a good mic, screen capture, and editing software; a camera is optional but helpful.
How do I ensure reproducibility in my video?
Document all inputs, configurations, and prompts. Share a link to a repository with code, data, and step-by-step instructions to reproduce the demo.
Record configurations and share a repo with code and data so others can reproduce exactly.
Can I reuse content from other tools?
You can reuse non-copyrighted concepts and lab notes, but always cite sources and obtain permissions for proprietary assets.
You can reuse ideas with proper attribution and licenses.
How should I promote my AI tool video?
Publish with an optimized title, description, and tags; share in relevant communities, and respond to viewer questions to boost engagement.
Publish with strong SEO and engage with the audience in comments.
Watch Video
Key Takeaways
- Define a clear objective and audience.
- Plan with a reproducible demo at the core.
- Keep narration concise and visuals supportive.
- The AI Tool Resources Team recommends prioritizing clarity and reproducibility for trust.